I have a confession to make. I do acting. Love to do acting and as I’m an amateur this also means that I sometimes have to do light and sound when I do not have a role in the play myself. For years this has been done by an elder guy who unfortunately has left the club and I was left with his legacy: “A set of CD players hooked up to a mix panel”. Hmmm… CD’s? That’s not my cup of tea, so I decided to replace all playback devices with a simple Raspberry Pi, capable of playing back all popular type of audio files and the option to mix them with some audio effects when required. The on-board sound of the Raspberry Pi is not really good though so I had to add a DAC. In this blog post I’ll shortly explain how I managed to install and configure a PiFi DAC and Mixxx on a Raspberry Pi 3 in such a way that it works flawless.
Step 1: Buy a PiFi
Even though the HiFiBerry looks really nice, I considered it pretty costly. After a lot of reading I decided to go for a PiFi which can be bought on AliExpress for around € 25,- including a nice acrylic case and free shipment.
Assemble the kit and you are good to continue to step 2.
One special note: Use the bolts of the acrylic case as placeholders to lift the Raspberry Pi up from the table. This lets it dissipate heat from its processor which is located at the bottom more easily.
Step 2: Download and install Raspbian with Pixel
As we use Mixxx as the audio mixing software which cannot run from a console, we need a UI with a desktop. The fastest and most stable running and thus best choice is Rasbian with Pixel desktop. Just follow the guide on how to get the Pi up and running. Run the raspi-config as you would do normally, but DON’T enable the experimental OpenGL driver as Mixxx does not like that.
Step 3: Configure the Pi and its Fi
The configuration of the PiFi is easy once you know how. Open a console and execute the following commands while you answer “Y” on any questions.
sudo apt-get update

sudo apt-get upgrade

sudo rpi-update
This forces the Raspberry Pi to update its kernel to the latest. If you do not execute this action, you will not be able to use Mixxx without a lot of stutter caused by buffer underflow!
Now simply reboot.
With the Pi fully updated, we can configure the audio settings.
Open a console and execute the following commands:
sudo nano /boot/config.txt
You are now viewing the boot configuration file of the Raspberry Pi. You will see a lot of configuration lines in there with a # in front of them. These lines are commented out and thus not active. You can enable these configurations by simple removing the # sign.
Just make sure that you un-comment OR add the following lines to your config. Just make sure these lines are there and not commented out.
dtparam=i2s=on

dtoverlay=hifiberry-dacplus

dtoverlay=lirc-rpi:gpio_in_pin=26
Now remove the following lines, or place a # in front them, if they exist.
dtparam=audio=on

dtoverlay=lirc-rpi
We’ve enabled audio through I2S (the pin headers), enabled the hifiberry-dacplus driver (which is the compatible driver for the PiFi) and enabled the IR module on the PiFi which is not available on the HiFiBerry.
We’ve disabled on-board audio and the ir-hat that we do not have.
Use Ctrl-X to exit and save (Y) the config.txt (ENTER) file.
Once in the console again we can type the following command:
sudo nano /etc/asound.conf
and then type the following:
pcm.!default {
    type hw card 0
}
ctl.!default {
    type hw card 0
}
Use Ctrl-X to exit and save (Y) the asound.conf (ENTER) file.
Reboot your Pi and congratulate yourself with fully configured Raspberry Pi with PiFi DAC!
Step 4: Install and configure Mixxx
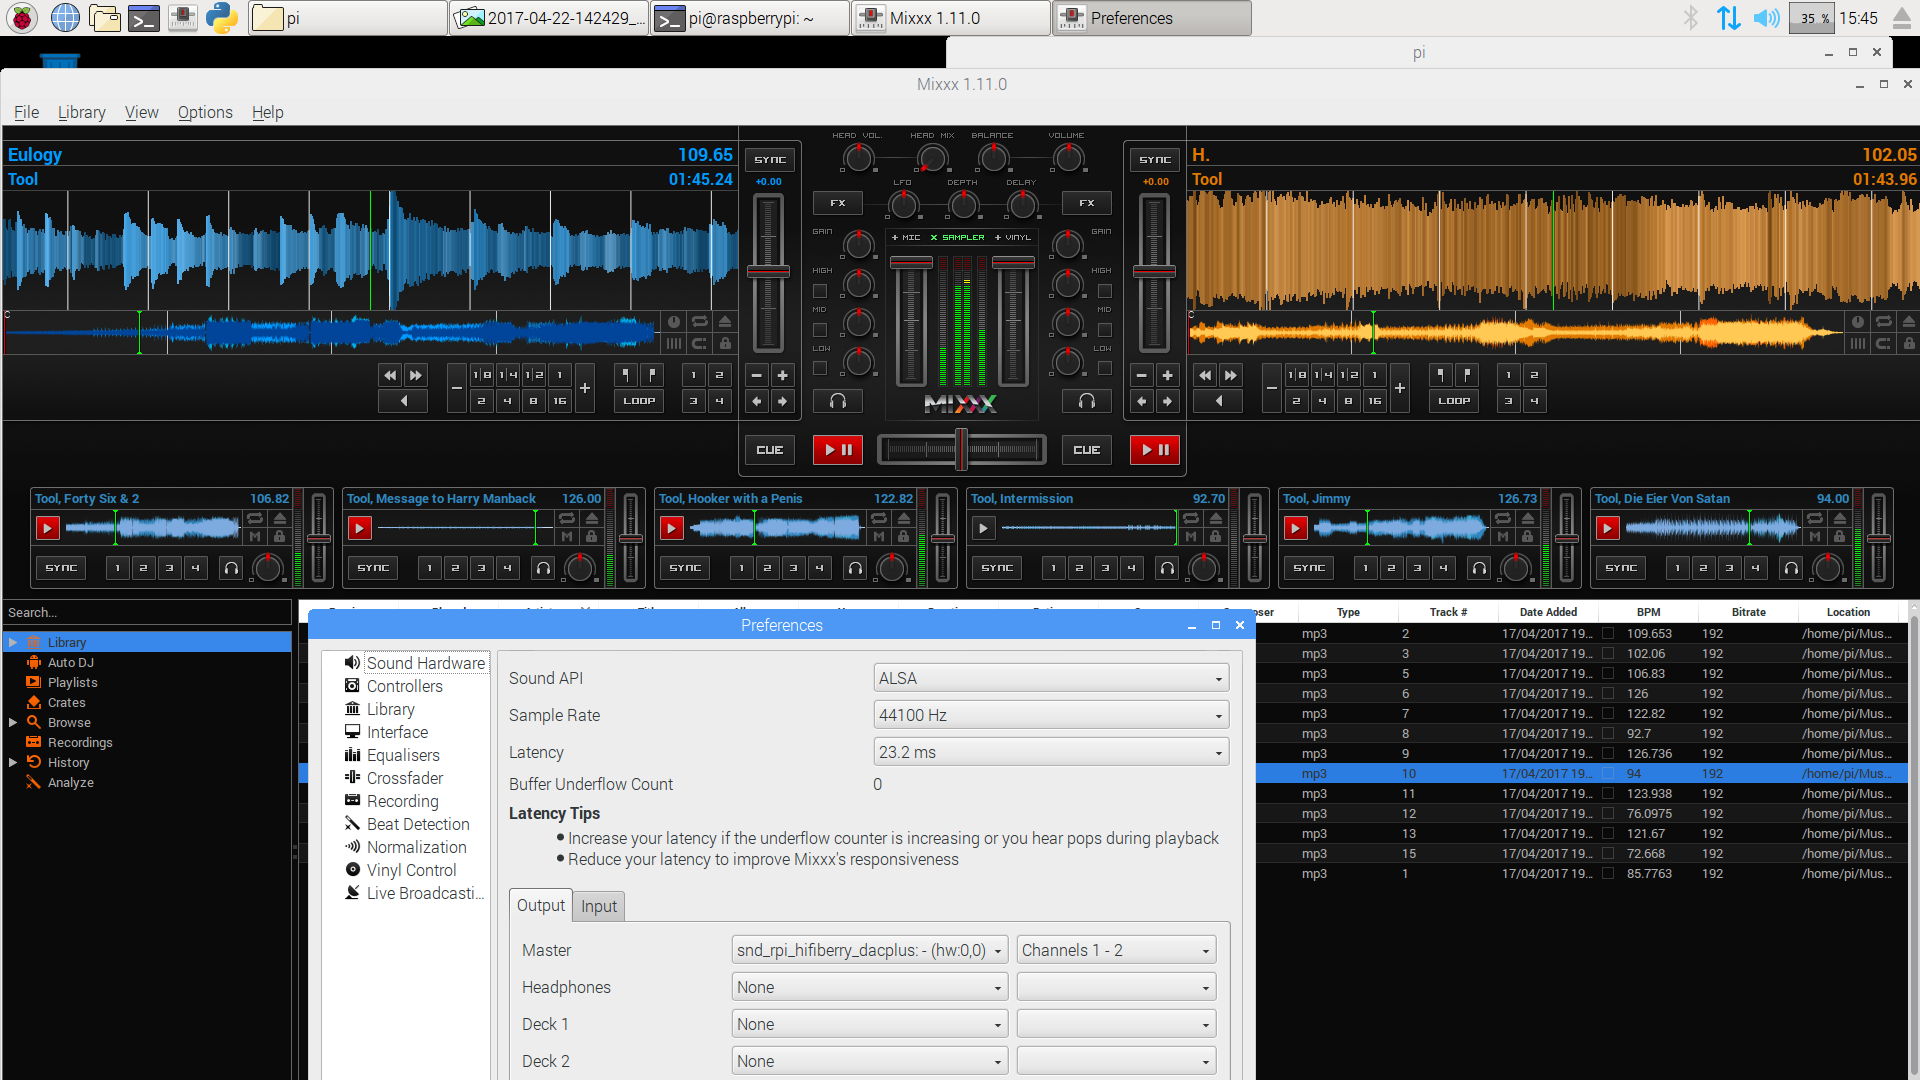
You do have two options. You can install the latest and greatest Mixxx 2 by building the application from source. They have a decent guideline on how to do that on their website. It does work, but for my use version 2 does not add any real value at all (cover art, FX, 2 extra decks), while it uses more processing resources. As my device is going to be used in a theater where stability and performance is much more important than the latest and greatest auto mixing features and cover art, I decided to go for Mixxx version 1.11.0 which is available in the default Rasbian repository. This version turns out to run very fast and smooth. I could play 8 songs simultaneously (using the samplers) at the same time without a single buffer underflow and the processor at around 35% usage, which in turn ensures it stays cool enough. So I recommend to install Mixxx 1.11.0 as follows.
Open a console and execute the following command while you answer “Y” on any questions.
sudo apt-get install mixxx
With Mixxx now installed we need to do some configurations inside Mixxx.
Start Mixxx and goto: Options->Preferences
On the “Sound Hardware” tab select the “snd_rpi_hifiberry_dacplus:-(hw:0,0)” “Channels 1 – 2” for you Master Output
On the “Interface” tab select “HSV” as the “Display type” for your “Waveform Display”. “HSV” or “empty” are the only usable ones on a Raspberry Pi.
Now enjoy your HiFi audio!